
I'm not one who is very good at drawing, thus, I decided to use another method for the strawberry leaves instead of drawing them. That's it, Tape! It's really an alternate way to get the look of the leaves other than drawing them!
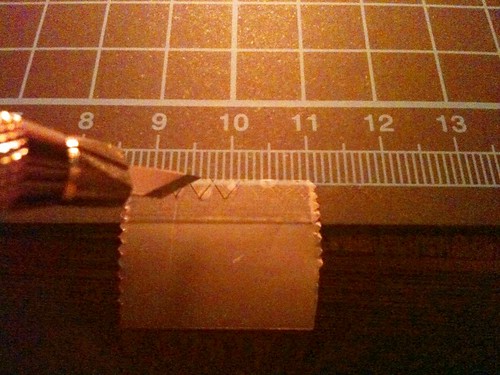
Used an art knife to cut the triangular shapes instead of a scissors. It works better ^^.
I deliberately cut more than what I think my nails can take so as to avoid any mistakes when I am in actual progress. It will really be a headache if your nails are already painted then you realise you still need to do further tape cutting. But yes, I did all these tape designs before I did anything to my nails :D
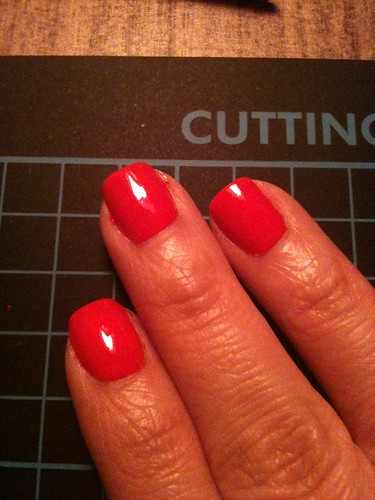
After all the tape designs for all my 10 nails were completed, I started painting my nails. First, paint your base color! Since this is Strawberry Nails, the base's naturally gonna be RED. For this red color, I used Etude House's chili red nail polish which is unnamed but termed RD103. Love the smooth application!
Next, wait for them to dry a little and applied top coat on them. For me, I used Seche Vite Fast Dry Top Coat precisely due to the fact that it dries my nails in a god speed manner. A ridiculously good companion for nail art & tape manicure! After SV has been applied, wait for a brief 2-5 mins and get your tapes on your nails for a fun tape manicure session , hehe.

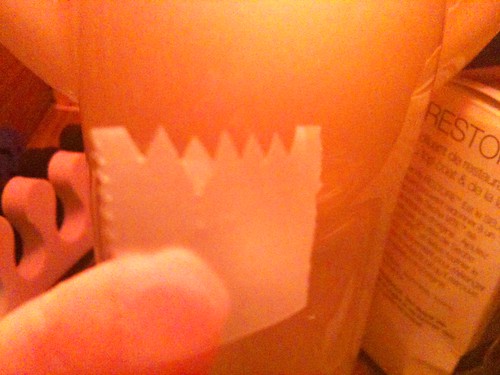
Well, this photo's slightly blurred but I think it still shows how I placed the tape on my nail. Since it's gonna act like a strawberry leaf, it really doesn't matter if you want to place the tape just the way I place mine, or you want to place it at the tip. It all depends on which angle you want to look at your strawberry nails. If you look carefully on the photo, on my index finger, you will see how it will look like after you coated the un-taped area with green color. For me, I used Eilanto's cheery green which contains slight shimmering. Once again, it is unnamed with a number. Remember, peel the tape away the moment you have finished painting the un-taped area. DO NOT wait till it's dried or the applied lacquer will peel along with the tape.
Once all nails are taped and applied with green lacquer, it's time for dotting fun! In this tutorial, I did not take any photos of the dotting as my hands were all full :( Nonetheless, just DOT away with fun as the dots are meant to act as the 'seeds' of the strawberries on your nails! Last but not the least, apply Seche Vite (SV) on your finished product a.k.a your 10 yummy nails.
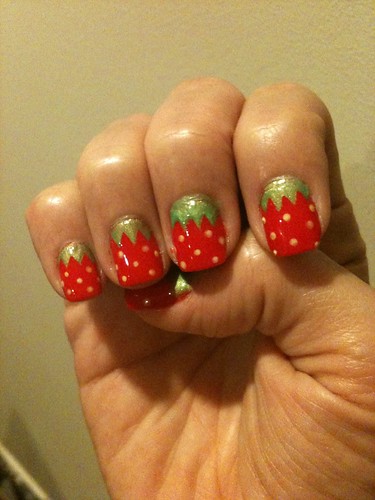
There you go, 10 yummylicious Strawberries on your very own nails!
It was my first attempt thus, there's definitely flaws somewhere in the midst of doing this piece of nail art but I am definitely proud of myself for being daring enough to attempt it, much less to see that it's quite a fine piece of art on my very own nails!
This nail art had lasted me for at least a week. Being a clumsy person I always have been, it's pretty lasting already! If you are careful enough, I believe they can last you for more than a week for sure :D
Hope you enjoyed the tutorial on Strawberry Nails. More to come soon :D


